 Every child dreams of one
day reaching the stars and to see what goes beyond it. Dreams of all the wonders and mysteries of
the universe and to boldly go where no man has gone before. Good news is that you don't have to be a
Rocket Scientist or a member of Star fleet.
With the use of old Carton Boxes and
a lot packaging tape, you can make your own Rocket Ship and continue
your dream of visiting distant worlds and galaxies.
 Materials:
Old Carton Boxes
Packaging Tape
Double Sided Tape
Colored Tapes
Plastic Cups
Aluminum Plates
Carton Rolls
Dried-up Permanent
Markers
Glue Gun
Glue Stick
Poster Paint
Bottle Caps
Styrofoam
Scissors
NT Cutter
Procedure:
1. Choose a large enough Carton Box to serve as
the body of your Rocket Ship. Make sure
it's clean and free from any unwanted left over chemicals. Fold the cover inside the box to strengthen
it.
Attache it to the sides of your Rocket Ship with double sided and packaging tape. Applying glue stick will strengthen your Rocket ship.
4. Now that You've finished the body of your
Rocket Ship you can now start decorating and adding some accessories. However, it would be better to paint your
Carton Boxes before putting them together as painting over the tape, could get quite tricky. To make the steering wheel
of your Rocket Ship, cut a piece of Styrofoam enough to fit inside the
front of your Rocket Ship. Using the
empty Carton Roll from your fax paper, gently insert it through your Styrofoam and attach it to the Carton box using your Glue Gun.
5. For the Steering Wheel, make a small hole in
the middle of your aluminum plate and gently attach it to the Carton Roll.
Secure the end with double sided tape to prevent the Aluminum Plate from
falling.
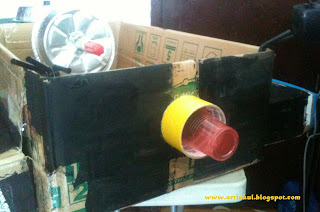
8. Were almost there. No Rocket Ship would be complete w/o it's own
laser gun and missiles Remove the caps from your dried-up permanent markers and
cover it w/ colored tape.
10. Attach them to the wings of your Rocket Ship
using your glue gun. You can attach
bottle caps inside your Rocket Ship as buttons.


No comments:
Post a Comment